Kitchen Backsplash

Houston Guide: Turning Garages into Guest Suites.

Houston

– Understanding the Popularity of Garage Conversions

Houston Guide: Turning Garages into Guest Suites

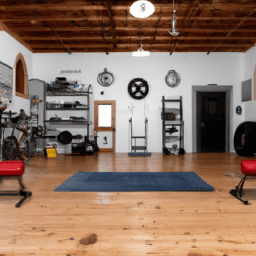
Do you have an unused garage that’s just sitting there, collecting dust and being underutilized? Maybe it’s time to look at your garage with fresh eyes and imagine the potential it holds. In Houston, a growing trend is the transformation of garages into chic, comfortable guest suites. This article serves as a comprehensive guide to going about this renovation project, addressing everything from the considerations to keep in mind to the potential costs involved.

Why Convert Your Garage Into a Guest Suite?

The question is: Why not? The decision to convert your garage into a guest suite contains multitudes of benefits. Not only it gives you an additional living space, but in cities like Houston where space is a premium, it can significantly increase the value of your home. Moreover, it’s an excellent way to accommodate guests or house aging parents while giving them enough privacy. It can even be rented out for extra income. Instead of leaving your garage a cluttered deposit of seldom-used items, why not transform it into something beautiful, useful, and potentially profitable?

Preliminary Considerations: Legal and Structural Issues

Turning your garage into a living space is a big deal, so before you dive headfirst into this project, there are some preliminary considerations to keep in mind. Firstly, in Houston, as is the case in most cities, there might be legal regulations for converting garages into living spaces. Make sure to check the zoning laws and building codes. You might need permits for everything from plumbing to electricity. So, before the first hammer swings, visit your local planning department and ensure all is legally in check.

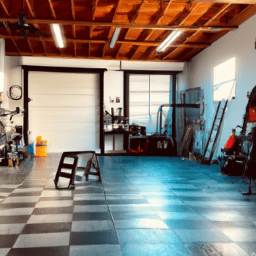
Structurally, there are several factors to consider like wiring, ventilation, insulation, and floor height adjustment. Also, you may need to reconsider your garage’s entrance. A roll-up door might not fit the aesthetic of a cozy guest suite.

The Cost Element: How Much Is It Going to Cost Me?

The costs of garage conversions can vary drastically depending on the existing structure, the degree of modification required, and the expected finish level. Here’s a rough breakdown of potential costs:

| Types of Costs | Potential Charge |
| ————— | ————– |
| Full Garage Conversion (with bathroom and kitchen) | $20,000 – $50,000 |
| Basic Room Conversion (No bathroom or kitchen) | $10,000 – $15,000 |
| Extra Costs (permits, higher-grade materials) | Vary |

This estimation is for general understanding and actual costs may vary based on various factors. However, when considering the potential value add to your home, these costs may be well worth it, especially in expensive areas like Houston.

Let’s Get to Work: Steps to Conversion

Once you’ve assessed the legality, functionality, and cost, and decided to go ahead with this promising project, here are basic steps to converting your garage into a guest suite:

  1. Clearing Out: Remove everything from the garage. It’s time to let go of those items that haven’t seen daylight in a decade.
  2. Designing: Make a plan of how you want the space to look and function. Are you including a bathroom or kitchen? Where will the windows go?
  3. Getting Permits: Work out the necessary paperwork. Remember: stay on the right side of the law!
  4. Foundation and Construction: Start modifying essentials like flooring, walls, roof, and doors. Insulate and ventilate as required.
  5. Installations: Introduce electricity and plumbing if you’re adding a bathroom or kitchen.
  6. Finishing Touches: Paint, furnish, decorate and accessorize the room to your liking. Your cozy guest suite is just a few brush strokes away!

Dream Big but Stay Grounded

Transforming your garage into a guest suite can be an exciting project, offering the chance to unlock your home’s potential in terms of space, value, and convenience. However, it’s important to keep in mind the legal and structural considerations, along with the cost involved. Houston, with its flourishing real estate market, stands as a promising city for such projects. Keep this guide handy, and you’ll be well on your way to making this worthwhile investment. Who knows? You might end up creating a space so comfortable, your guests will never want to leave!

Isn’t it time we banished the notion of dusty, unused garages? Let’s embrace their potential and welcome a new dawn of garage guest suites in Houston!

Gulf Remodeling offers residential and commercial remodeling and renovation services. Contact us for a free consultation on your next project.

Grout Matters: Choosing the Right Color and Type for Your Backsplash.

Keywords: ⁤Grout

Are there any maintenance issues ⁣associated with⁤ certain grout colors for⁣ backsplashes?

**Grout Matters: Choosing the Right Color and Type for⁤ Your‌ Backsplash**

**Understanding Grout in Your Backsplash**

Before we delve into how to select the right color and type of grout⁣ for your backsplash, it’s essential to understand what grout is. In simple terms, grout is ⁤a dense fluid used for filling​ gaps or sealing joints⁤ in masonry, tiles, and other construction structures, a nearly unseen workhorse in any ⁣tiling project. This paste is made up of cement and water which becomes hard when set, successfully filling in the spaces between ⁣tiles⁤ and keeping them strong and in place. The‍ true value of grout, however, goes beyond its functional purposes.

So why does⁢ grout⁤ matter? It plays a⁢ big role in ⁣the aesthetics ‌of backsplashes found ⁤in kitchens or bathrooms. Your⁤ choice of grout—its color, type, and even application—can drastically change the overall look of your tiling.

**Choosing the Right⁤ Color**

When ‌it comes to choosing a color‌ for your grout, a⁤ world of⁢ possibilities is open to ‍you. The key lies in first ⁣understanding ‌the look you⁤ want for your backsplash.

Something‍ as simple as grout color can dramatically affect your tile’s appearance ⁤and overall room aesthetics. For example, using a⁢ grout color that​ contrasts with your tiles can make them stand out more, perfect for decorative ⁣tiles⁢ or unique patterns. On the⁢ other hand, opting for a grout⁤ color that matches the‌ tile can create a⁣ seamless⁤ look, giving the illusion of a larger ‌space.

**Understanding the Different Types of Grout**

With color out of the way,⁤ our focus now shifts to grout⁢ types. They‍ are mainly three; sanded, unsanded, and epoxy grout.

*Sanded grout* is‍ favored for wider grout joints, typically measuring over 1/8″. This type of‍ grout contains fine sand and helps prevent shrinkage, making⁢ it excellent for larger grout lines.

*Unsanded grout*, as the name​ suggests, does not contain sand. It’s smoother and easier to work with,⁢ especially ⁢on vertical surfaces like backsplashes. For​ grout space measuring less than 1/8” wide,‍ unsanded grout is highly recommended.

Lastly, *epoxy grout* is made up of resin and ‌filler. It’s⁣ known for its ‌durability, non-porous nature, and resistance to ​water‍ and stains, making it perfect for heavily-used areas like kitchens and bathrooms.

**Assessing Your‌ Grout Needs**

Now that you’re⁤ conversant with grout types, it’s time to converge your needs and preferences. Your decision should be driven by the ⁣gap size between your ​tiles, tile type, and the kind of look you’re after.

For instance, if your tiles are set closely together, unsanded grout should be your go-to choice. It ​is also applicable for delicate materials such as glass or polished ‌stone that‍ might be⁢ scratched ⁣by sanded grout.

Having a cost projection is⁤ essential, ‍and this‍ depends on your type of grout. For example, as of 2021, expect to pay‌ around $0.10 to $0.25 per square foot for sanded grout, ⁢$0.20 to $0.35 for ⁣unsanded grout, and $1 to $2 for epoxy grout.

**Bringing Backsplash to Life**

Your selection of the right grout, both in color and type, can elevate a humble backsplash into an‌ integral part of your kitchen’s visual⁣ appeal. These considerations, while they may initially seem trivial, are instrumental in the final look and functionality‍ of your backsplash.

So next time you’re contemplating a kitchen update or a bathroom remodel, ⁤do⁣ not underestimate the ⁣power of these ⁤little details. Because when⁢ it comes to a backsplash, grout‌ truly matters. It’s not just about protecting your tiles and walls ‌from ‌moisture and dirt – it’s about‌ creating a unique, eye-catching design ‍element that perfectly‍ complements your home. Would a simple white⁣ subway tile backsplash have the same⁣ kind of ⁣standout presence without the‌ contrast of dark grout? It’s worth giving it a thought.

Like they ⁣say, the devil isn’t just in the details, it’s⁣ also in the grout lines!

Houston’s Modern Garage Tech: EV Stations & Sensors.

– Subheading: Leveraging Smart Sensor Systems in​ Houston’s Modern Garages

Houston’s Modern ‌Garage Tech: EV⁤ Stations​ & ‌Sensors

As America’s fourth largest city, Houston’s devotion to innovation and modern technology is nothing short of impressive. One astonishing ⁢example of this is the city’s modern garage technology, especially regarding the trailblazing adoption and development‌ of Electric Vehicle (EV) stations and sophisticated garage sensors from the city’s​ tech community.

The Evolution of Houston’s Garage Technology

Once just a place to park the car and stash rarely ​used items, garages are now ‌evolving into forward-thinking spaces accommodating 21st-century needs. Houstonians are leveraging technology to bring their garages into the modern ‌age, particularly focusing on the rise of electric vehicles (EVs) and the incorporation of advanced sensors.

Garage Tech Gets Electric: ‌The Emergence of⁢ EV Stations

A rapidly growing number of Houston homeowners are adopting ‍electric vehicles. To meet this demand, modern‍ garages are morphing into personal charging stations, allowing EV-owners to power their vehicles from the convenience‍ of their ‌own homes.

Home EV Charging Station Costs

Houston’s modern garage tech has embraced the addition of home EV charging stations. While ‌installation costs vary significantly depending on various factors, such as power level and labor, prices generally range from $500 to $2,000. This investment is often offset by the immediate‌ availability of charging and the cumulative savings on public ⁤EV charging costs.

Advanced Garage Sensors: More Than⁢ Just Movement Detectors

In addition to EV stations, garage sensor⁤ technology in Houston has ⁢witnessed a significant tech boom. These smart sensors take the concept of traditional movement detectors and expand upon it, introducing features such as intelligent lighting, security enhancements and temperature control.

Security Enhancements and Lighting Automation:

Smart sensors can trigger alarms and send notifications straight to a homeowner’s smartphone. This feature can offer peace of mind, especially‍ when away ⁢from home. Additionally, integrating sensors with​ automated lighting systems can increase the garage’s functionality, as lights can be programmed to turn on or off according to specific triggers or set schedules.

Temperature ⁣Control: A Game-Changer for Houston Garages

Given Houston’s notorious summer heat, temperature sensors are a noteworthy addition to ​the local garage tech scene. These devices can regulate a garage’s environment, activating fans or AC units when temperatures surpass a defined‍ threshold. This ⁢feature can protect vulnerable items stored in the garage, such as ‍liquids, ‍which may ‌spoil ‍or degrade under extreme⁤ heat.

The Impact on Houston’s Sustainability

Houston’s adoption of modern garage tech signals ​more than just technological ⁤advancement; it also promotes sustainability. With more Houstonians utilizing home EV charging stations, the city can reduce its reliance on fossil fuels, contributing to a cleaner​ and greener environment. Furthermore, ⁢smart sensors with automated ⁣lighting can lower energy usage, thus promoting a more resource-efficient garage.

In Conclusion

Houston’s commitment to modern ⁢garage tech, including EV ⁤stations and smart sensors, showcases the ​city’s innovative spirit. Through these technologies, garages are primed to play a critical ⁢role in Houston’s clean energy strategy, offering a fascinating glimpse of⁣ what’s in store for this ever-evolving⁣ city.

Houston: A technological trendsetter

So, as Houston continues to push technological boundaries in its pursuit of modernity, will other cities⁣ follow? Whether in Silicon Valley or New York, the ⁣likelihood seems high. Houston’s embrace of advanced garage tech signals ​a trend that might soon become a widespread norm, transforming the humble garage into a tech-savvy, green-friendly hub nationwide. The future of the American garage, ⁣it seems, may have been pioneered right here in Houston, Texas. Gulf Remodeling offers residential and commercial remodeling and renovation services. Contact us for a free consultation on your next project.

Mirrored and Metallic: A Glimpse into Reflective Backsplash Options.

Mirrors

How can ​a metallic backsplash enhance ⁢the overall ⁤aesthetic of a bathroom?

Mirrored and Metallic:‌ A ‍Glimpse into Reflective Backsplash Options

Transform your ‍Kitchen with Dazzling Reflective ⁣Backsplashes

One of the simplest, ​yet profoundly effective ways to infuse exuberance into a⁣ somewhat lackluster kitchen is by installing a‌ reflective backsplash. The ⁢allure of mirrored and metallic surfaces lies in their ability to illuminate ⁤spaces by reflecting natural and artificial lights, inevitably creating ‍an ‍impression of increased space. These reflective backsplashes, available⁢ in an assortment of styles, textures, and finishes, ⁢provide plenty of room for creativity and can be tailored to embody any aesthetic,⁣ be it modern, rustic, retro, or minimalistic.

Maximize your Space with Mirrored Backsplashes

Mirrored backsplashes are ‌a bang-on trend, capturing the imaginations ‍of homeowners, designers, and architects ‌alike. But what ⁤makes them ‌so desirable? To start with, mirrors add depth and amplify space by reflecting light and opening‍ up a room, almost performing a magical trick on our perception. So, if your kitchen is spatially challenged, this is your answer​ to ⁤give it the illusion ‌of ‌space and light. Moreover, mirrored backsplashes come in a variety of types: you can choose from antique, smoked, bronze or traditional silver ⁢to match your‍ personal style. They are easy to clean and maintain, marking a win-win for both aesthetic appeal and ‍practicality.

Embrace Luxury and Luster‌ with Metallic Backsplashes

If you want to⁤ incorporate a touch of opulence‍ and elegance, metallic backsplashes provide just the⁣ right measure of glamour. Whether it’s the⁣ shiny ⁢allure of stainless steel or the⁢ warm, ​rustic charm ⁢of copper and brass, metallic backsplashes can make a bold statement. An example ⁢of ​this⁣ is the hammered copper backsplash, offering an ‍edgy yet traditional look​ with its ⁤beautiful texture. In contrast, a brushed ​stainless steel backsplash exudes a sleek modern aesthetic that effortlessly aligns with contemporary styling. It’s worth‍ noting that ‍these materials can withstand high temperatures, ‍are moisture-proof, and ‍of course, easily cleaned,‍ which is a significant boon for busy, functional‌ kitchens.

Mirror Vs. Metallic Backsplashes: Comparing the Costs

When it comes to cost-efficiency, mirrored backsplashes generally take‍ the lead. Standard mirrored tiles can range anywhere from $15 to $50 per square foot, depending⁤ upon the type and finish. Conversely, metallic backsplashes, speak of a slightly higher ‍range. Stainless steel tiles can start from $20 and go‍ upwards of $100 ⁤per square‍ foot, based⁤ on the quality and design, while copper or bronze backsplashes hover between $30 and $70.

Cost Comparison:

Material Price Range(per sq.⁢ ft)
Mirrored $15 – $50
Metallic (Stainless steel) $20​ -⁣ $100+
Metallic (Copper/Bronze) $30 – $70

Reflective Backsplash – A​ Worthwhile Investment for your Kitchen?

Reflective backsplashes,‍ whether mirrored or metallic, not only offer an eye-pleasing transformation but are also a ‌worthy ​investment for a functional kitchen. They marry well with⁣ both traditional and contemporary design schemes and provide practical benefits that boost their value further. With light bouncing ​off the‌ metallic⁢ or mirrored surfaces, every corner of⁢ your kitchen will sparkle, making your kitchen a far⁢ brighter and inviting space. Every time you walk into your kitchen, you’ll appreciate⁣ the transformation. Man-made⁣ or natural, cheap or expensive, backsplash options are many, ​all you have to⁢ do is lean into your taste and embrace the shimmer of reflection.⁢ The bottom ‌line is, a reflective backsplash may be just the face-lift that your kitchen needs.

Avoiding Common Mistakes When Installing a Kitchen Backsplash.

Kitchen

How can I avoid uneven tiles ⁣or gaps in my kitchen backsplash installation?

Avoiding Common Mistakes ⁤When Installing a Kitchen Backsplash

If you’ve decided to take the DIY route and install your kitchen backsplash, kudos to you. It’s a great way to save some bucks ‍and customize your kitchen to your taste. But, navigating this DIY route ‌can be fraught ⁢with pitfall. We’ve seen homeowners commit expensive blunders, from poor preparation ⁣to hasty execution. In this article, we’ll shine⁢ light on common pitfalls and provide expert tips to⁣ install your dream backsplash without hitches.

The Miscalculation ⁣Trap

The first common mistake that many amateur DIYers make ‌is miscalculating the area to be covered. This is‌ no trivial error, as it invariably results in a​ shortage or wastage of material. A handful‌ of this miscalculations, and not only does it prolong the project, but also inflate ‌costs. One might think that this mistake​ is a novice’s territory, but even seasoned DIY practitioners ⁤are not entirely immune.

So, how can⁢ you avoid this blunder? The answer is simple – Measure thrice, cut once. Make sure to accurately calculate​ the area by measuring‌ the length​ and height, then multiply these to give you the total coverage⁢ area. Don’t forget to account for areas around windows or over the cooktop. When‍ you’re sure of the⁢ area’s measurement, add an extra 10% to account for cutting and ​fitting wastes.

Skimping on‌ Material Quality

It’s true that everyone loves a good deal, and when it comes to DIY projects, the urge‌ to cut costs could be overpowering. However,​ purchasing ⁢low-quality materials as⁤ a cost-cutting measure could⁤ prove disastrous​ in the end. Low-grade materials often look poor and can fail prematurely, leading to more costs in repairs and replacements.

In other words, quality should‍ not be compromised for cost. Instead,⁣ strive‌ for a balance in making your material ‍selection. Comparisons like⁤ the table below show the cost-benefit analysis ⁤of ‌select backsplash materials:

Material ⁢Type Initial Cost Maintenance Cost
Porcelain Tile $450 Low
Marble Tile $600 High
Glass Tile $500 Moderate

Rushing the Installation

Patience, they say, is a virtue, and when ‍it comes to installing a‌ kitchen backsplash, it cannot be truer. Rushing through the ‍process might lead to haphazard installation, visible seams, uneven lines, and overall poor aesthetics. Apart from the disappointing outcome, ​correcting these mistakes can take additional‍ time and resources.

Remember, ‌Rome wasn’t built in ⁤a day. Dedicate proper time for careful‍ planning, patient execution, and meticulous finishing.⁢ This way, the fruits of your labor would not just make your kitchen shine but also withstand the test of time.

Ignoring Preparation

It’s tempting to sail directly into installation without putting much thought into preparation. Well, except if you‌ want to see your project quickly backfire, this ‌is a boat you’d rather not sail.‍ Investing your ⁣time in ⁢preparation – cleaning the surface, removing greasy spots, or ⁤old paint –⁣ sets a ⁤solid‌ foundation⁢ for your backsplash to adhere.

What more? To better aid preparation, there are backpack specific adhesives in the market that ‍not only bond‍ better but also hide imperfections on the wall. After installation, grouting the tiles with the right product‍ will help keep them in ​place, while preventing water and ‌stain penetration.

Conclusion

There you have it, some of the common mistakes people make when installing a kitchen‌ backsplash ⁣and ⁤how to avoid them. By accurately measuring your space, investing in good quality materials, pacing your project correctly, and not skipping surface preparation, ‌you’re already on your way ‍to a successful DIY kitchen backsplash project.

Ceramic vs. Porcelain: Which Tile is Best for Your Kitchen Backsplash?


Ceramic

What are the key differences between ceramic and porcelain tiles for kitchen backsplashes?

Is there a better way to update your kitchen than with a stunning new ⁤backsplash? It’s like a face-lift for your ​kitchen. The two most popular options, ceramic⁣ and porcelain, are both laudable ‍picks, each boasting their⁣ unique pros and cons. However, which one is the best fit for your kitchen? Hang around ‌as⁣ we delve into the world of kitchen⁤ tiles, comparing​ ceramic and‍ porcelain.

A Closer Look at Ceramic Tiles

Ceramic⁢ tiles are ‌a classic pick for kitchen backsplashes. A product of kiln-fired ⁣clay, these tiles pack a punch in terms of aesthetics and practicality. An all-time favorite, ceramic ‍tiles provide a uniform look due to their consistent size and ‍shape. Their glazed surface often ensures they are stain and scratch-resistant, ideal⁣ for an area in your kitchen that is constantly splattered with a myriad of ingredients.

Ceramic tiles are also ​an affordable‍ option. On average, ‍they cost between $5 and $10 per⁤ square foot, with installation ‌costs ranging from $3 to $7 per square foot.⁣

Unmasking the Porcelain Tile

Porcelain tiles, on the other hand, are a premium choice. They ‌are a subtype⁢ of ceramics‍ and are ⁣made by using finer, denser clay and fired at higher temperatures. This process results in a tile that⁣ is⁤ not only more water-resistant but also more durable than ceramic options. Hence, they are perfect for⁤ kitchens that get a lot of use.

However, this higher-end product comes with a higher price tag. On average, porcelain tiles cost between $5 and $20 per square foot, and the average cost⁢ of‌ installation ranges from $4 to $19 per square foot.

Which Tile is the More Durable Option?

Durability is ‍key​ when selecting kitchen tiles.‍ Porcelain is notably more durable and resistant‌ to heavy impacts compared to ceramic tiles⁤ which can make it a more practical choice for busy kitchens. However, this doesn’t mean ceramic tiles can’t stand up to regular kitchen use. With ​proper care and maintenance,⁣ ceramic tiles can last for years in your kitchen.

Aesthetic Appeal: Ceramic vs. Porcelain

In addition to durability, the appearance ⁤of the‌ tiles is essential. Both ceramic and porcelain tiles‌ come in a myriad of colors, patterns, ⁣and textures. However, porcelain tiles often imitate the look of natural stones more realistically. This gives you a wider⁣ range of design options ​and adds to the sophistication of your kitchen. On the other hand, the simplicity and ‌classic appeal of ceramic tiles also make it a great choice,⁢ particularly for traditional kitchen designs.

Choosing Between Ceramic and Porcelain:⁣ A‍ Quick​ Recap

Ceramic Tiles Porcelain Tiles
Affordable More expensive
Slightly less durable More durable
Classic and ‍uniform look Imitates natural stones
Ideal for traditional kitchen designs Offers a range of design options

In the end, your choice between ceramic and porcelain tiles will hinge on your specific needs,⁣ preferences, and budget. Both⁣ offer ‍great durability and aesthetic appeal in their own ways. ⁣Remember, it’s your ⁣kitchen, choose what makes you feel truly⁢ at home.

Mudroom Additions in Houston Garage Projects.

Mudroom

**3. Expert Tips for a Successful Garage to Mudroom Conversion in Houston**

Mudroom Additions in Houston Garage Projects

Houston’s Garage Innovation: Mudroom Additions

Homeowners in Houston are always looking for useful ways to maximize space, increase home value, and improve functionality. One innovative idea that’s gaining popularity is the garage mudroom addition. This versatile space offers endless possibilities and enhances the aesthetics of the garage.

Talking about converting garages into viable living spaces might seem unconventional, but it’s a clear-cut solution for families looking to add practicality and maximize their floorplans. A mudroom addition is not just about adding space – it’s also about improving organization and cleanliness, creating a convenient and charming area to store outdoor gear, shoes, coats, and more.

Why Choose a Mudroom Addition?

A mudroom is traditionally situated at the secondary entrance of the house. It serves as a transitional space between the outdoors and indoors, where people can leave their shoes, coats, umbrellas, and other paraphernalia. Moreover, mudrooms come with multiple benefits:


  • Organization: Shelves, cabinets, and hooks for coats, shoes, and everyday items keep them organized and readily accessible.

  • Cleanliness: Containing clutter in one place helps to keep the rest of the house clean.

  • Improved functionality: Mudrooms can be tailored to meet specific needs. They can be fitted with benches, sinks, drawers, even lockers. The possibilities are endless.

  • Increased home value: When time comes to sell, a mudroom can actually increase your home’s value.

The Process: From Garage to Mudroom

Creating a mudroom in your garage requires careful planning and execution. Here’s a basic rundown of the process:

Space Evaluation

First things first, evaluate the space available in your garage. The size and shape of your garage will determine the design and layout of your mudroom. A professional contractor can help you identify how best to utilize your space.

Design and Plan

After assessing the space, creating a design plan is the next step. This involves determining the overall layout, choosing the color scheme, selecting storage units, lighting and other design elements.

Installation

Professional contractors will install the framework, drywall, and any storage units or other features. Plumbing and electricity might also be required depending on your design.

Finishing

Finally, finishes like paint, cabinets, and other details are added to complete the transformation.

Costs Involved in Mudroom Additions

The cost of a mudroom project varies widely based on factors like size, materials, and labor charges. Here is a simple cost estimate table:


ItemCost
Basic Mudroom$2,500 to $5,000
Medium Mudroom$5,000 to $10,000
Luxury Mudroom$10,000 and up

Embrace the Convenience of Mudroom Additions

A mudroom addition within your garage could be just the space solution you’ve been searching for. It’s an investment that pays off in terms of convenience, organization, and increased home value. And given Houston’s rapid housing development, a garage mudroom could be the cherry on top of your modern family home. So why not explore this exciting avenue and see what a difference it could make in your daily life?

Remember, a successful garage mudroom project goes beyond just design. It involves careful planning, precise execution, and ultimately, the transformation of a once cluttered garage into a functional, pleasing space. And that’s why it’s recommended to collaborate with experienced and professional contractors to steer your vision in the right direction. So, are you ready to add a touch of functionality and style to your Houston home with a mudroom addition? Gulf Remodeling offers residential and commercial remodeling and renovation services. Contact us for a free consultation on your next project.

Seamless Transitions: Coordinating Countertops with Backsplashes.

countertops

How can⁤ I ensure a smooth transition between the countertop and backsplash materials in terms of both appearance ⁢and functionality?

Seamless Transitions: ⁣Coordinating Countertops with Backsplashes

The ⁤Art⁤ of Coordinating Countertops and ⁤Backsplashes

Imagine the delight of walking into a kitchen​ where ⁤the countertops and⁣ backsplashes ⁣blend​ seamlessly,⁣ creating a ​symphony⁣ of textures,⁢ colors, and patterns. It’s an aesthetic ⁢delight that stems from careful planning ⁣ and ⁣a keen eye for design. Coordinating countertops and backsplashes isn’t a mere whim; it’s an‌ art form ​that requires understanding the ⁤play of materials, hues, and style.‍

Desired results stem from ⁢decisions ⁢made right -⁣ an aspect that holds true when trying to achieve a synchrony between your countertops and backsplashes. Both components have ⁢to not just ‘get ‍along’ but actually compliment each other, thus enhancing the kitchen’s aesthetic appeal.

Why Does Coordination Matter?

To answer the question – why does coordinating countertops with backsplashes ​matter? -‌ imagine a stunning, expensive ‍marble‌ countertop completely overshadowed ⁤by‍ a loud, over-the-top ⁤backsplash. This discord not ‌only proves to be a wasted effort ‍but ⁤can also be quite disconcerting to ⁢the eye. That’s why it’s essential⁢ to understand ​the subtle art of coordination. It’s‌ about blending,‍ not ​battling!

Proper coordination establishes a visual⁣ connection between ⁢the countertop and the backsplash,‍ bringing ‌an ⁣element⁢ of harmony to your ‌kitchen. Given they‍ both occupy considerable visual space, a carefully made choice ​can make or break the kitchen’s⁤ overall​ aesthetic.

Bridging ⁢Countertops with‌ Backsplashes

So how does one bridge the gap between a countertop and a⁣ backsplash? Is ⁢there a secret formula or‍ a golden⁢ rule? While design and‍ preference ​are intensely personal and subjective, there are‍ some tried⁣ and ⁣tested routes ‌that seasoned interior designers often employ.‍

For starters, you can ‌pair​ countertops and backsplashes in the same color family. This theme offers ⁣comfort in its familiarity ⁣and ease of decision-making. Staying within the same color scheme allows for a neat,⁢ uniform⁤ look. A soft gray ⁤quartz countertop could pair well with a matching backsplash, especially if you’re aiming for a modern, minimalist ‍design.

![Countertops and Backsplashes Comparison](https://i.imgur.com/QsAnFEP.png)

However, similar does ⁢not mean identical! ⁢You can always add intrigue by opting for a backsplash ‌in a slightly darker or lighter shade than the countertop. Throw in different⁣ textures or materials, ​and you’ve got yourself a space that exudes ⁤personality and ‍taste!

Choosing Contrasting Countertops and Backsplashes

Both harmony and intrigue ⁤can also be found in ‌contrast! A granite countertop⁤ with specks of shimmering quartz ⁣could⁢ be beautifully​ offset ⁢by a deep, matte-finished backsplash. Or ‌a ⁢glossy, black countertop could throw into sharp relief an elegant, pearly white backsplash. The trick is to⁤ find balance – allowing ‍each element its moment to shine,⁤ without one overpowering⁤ the ⁤other.

Contrasts do not always have to ⁣be daring or dramatic. They can be as understated‍ or as​ pronounced as you like them. You could choose a sleek,⁤ stainless steel countertop with⁤ a warm-toned wooden backsplash for ‌an edgy, industrial feel.‍ Or‌ you could go for ‍a bold, red countertop against a surprisingly soft, ‍floral-patterned backsplash. ⁣The world of contrasts offers endless possibilities⁢ for you to explore.

![Cost Comparison](https://i.imgur.com/Jhwd5YR.png)

While this⁤ article may⁤ provide some handy‍ pointers, remember that it’s ⁣your kitchen! It’s an expression of your unique aesthetic and taste.⁣ So, don’t hesitate to experiment, mix-and-match, ⁤or create⁣ contrasts. Realize your ‌vision of a kitchen where every element, including countertops and backsplashes, come together ⁣to form a ⁣stunning, coordinated masterpiece!

So, whether it’s harmony or contrast,⁤ matching or offsetting, the dance between your⁢ kitchen ​countertop and ⁤backsplash ⁢can be⁣ a ⁢delightfully creative journey. Remember, in the realm of design, rules can be bent, and ‍conventions constantly redefined. Happy⁣ designing!

Houston’s Guide: Maximizing Garage Vertical Storage.

The How To: Maximizing Garage Vertical Storage

The garage is often an overlooked part of ⁤the house when it comes to storage. ​In this big, bustling city of Houston, where houses typically have smaller yards, it’s crucial to make the most out of every available space—and your garage is no exception. Today, ‌we’re going to talk about how you can squeeze out more from your garage by maximizing vertical storage .

Understanding ⁣The Value of Vertical Storage

Vertical storage refers to ‍the use of height -​ the wall and ceiling space in your garage -‍ to store items. Instead of spreading⁤ out horizontally,⁣ which takes ⁣up valuable floor space, we stack or hang items vertically,‍ creating ‍more room to navigate, park a vehicle, or ⁤even ‍set up a workbench.

According to a report from the National‍ Association of Home Builders , the average American home has 300 sq. ft. of garage space. If we assume that the average garage ceiling⁤ height is 8 feet, you’re looking at 2,400 cubic feet or so of potential storage space.⁣ That’s massive. By not using this vertical space,​ we miss out ⁢on a veritable treasure trove of storage opportunities.

Identifying Suitable Items For Vertical Storage

Before you go investing in ceiling ⁣racks ⁣and ⁣wall shelves, it’s essential to identify the items in your garage ⁢that are​ suitable ⁢for vertical storage. Long-handled tools like brooms, ⁣rakes, and shovels are perfect for hanging on wall racks. Seasonal items like holiday decorations, ​camping gear, and winter tires can safely be stored in ceiling racks, out of the way but easily accessible ⁣when needed.

Consider if the items are frequently ⁣used. Often-used items should be within easy ​reach, while rarely-used things can be ⁤stored higher.

Making the Right Storage ⁢Decision: Racks, Shelves or Hooks?

When it comes to vertical storage solutions, the three main options are: racks (particularly‍ overhead ceiling racks), shelves (fixed or‍ adjustable), and hooks. Your‍ choice between these⁣ options will depend on ‌your specific ​needs, the available space, and your budget.

| Storage Options | ​ Pros | Cons | Cost (Average) |
|—|—|—|—|
|‍ Overhead‍ Ceiling Racks | Maximize space utilization, Ideal for seasonal items, Very strong ⁢| Difficult to ⁣install, Items can be challenging to access | $150 – $400 |
| Shelves | Versatile, Adjustable shelving ⁤allows for⁣ customization,​ Easy accessibility | Takes up ⁢wall space, May require professional installation | ‌$100 – $500 |
| Hooks | Easy to install, Great for hanging tools and equipment, Cheap | Limited weight capacity, May require drilling into walls |​ $5 – $30 |

Remember, it’s⁣ important not ⁤to rush this step. Take ‌your time ‌to assess what solution best fits your‍ needs. You could even use⁢ a combination of‌ all three for ⁣the ⁤most optimized garage storage system.

Implementing Your Vertical ​Storage Plan

Once you’ve‍ identified your needs and chosen your ⁤storage solutions, it’s time to get to work. Here’s a⁣ simple step-by-step guide:

– Measure your garage dimensions (consider any obstructions like windows or doors)
-⁤ Purchase or order your chosen storage solutions ⁣
– Follow the manufacturer’s⁤ instructions for installation. Hire ⁤a professional ​if necessary.
– Once all the racks, shelves, or hooks are installed, start organising your items.

Remember, safety first. Always ensure your storage solutions are securely fastened to avoid any accidents.


Revamp Your Garage With Vertical Storage


Garage vertical storage can feel like discovering an entirely new room in your house. It might‌ require a fair bit of ‌measuring, planning and grunt work to get everything set up. However, the resulting orderly and free-to-roam garage space will be worth the effort.

So, what are you waiting for Houstonians? Start taking charge of your garage space today! Use that vertical space and revamp your garage into​ the most organized part of ⁣your house.

Going Green: Eco-Friendly Materials for Your Kitchen Backsplash.

Eco-friendly

Which eco-friendly​ materials are commonly used for kitchen backsplashes?

Going Green: Eco-Friendly Materials for Your⁣ Kitchen Backsplash

With ‌the growing awareness of environmental issues and the push to lead a sustainable⁤ lifestyle, there’s no better time ‌than now to ‘green’ our living spaces. One⁢ place to start? Your kitchen backsplash. While it may seem like a small change,‍ adopting green materials for⁣ your​ kitchen backsplash can significantly contribute to building a more sustainable planet. Let’s⁣ dive into the ⁢wonderful⁢ world of eco-friendly backsplashes, their benefits, ⁢features,​ and varieties!

Considering Your Options: Eco-Friendly ‌Materials

When it comes to eco-friendly kitchen backsplashes, you don’t have to compromise on aesthetics. There⁢ are numerous stylish, durable, and green materials ⁤to choose from.

Recycled Glass Tiles

Recycled glass tiles are a trendy ⁢and environmentally friendly option. ⁢Made from upcycled glass, ‌these tiles add a gleaming touch to your kitchen. ‍They’re⁤ available in a myriad⁤ of colors, patterns, and finishes, perfectly ⁤combinable with your kitchen’s ‍decor. Plus, they’re non-porous, resistant to heat, stain, and mold, making ⁣them an excellent choice for areas that often get splattered with water ‌and food.

Terracotta​ Tiles

Terracotta, meaning ‌’baked ‌earth’ in Italian, ⁢is a natural, durable, and eco-friendly‌ material. Terracotta tiles ⁣bring​ a warm, rustic charm to your kitchen. They’re made from natural clay, fired at low temperatures, reducing energy usage. Terracotta is‌ biodegradable and recyclable, making it a low-impact choice ‌for your kitchen backsplash.

The Cost Analysis: Comparing Options

Features ⁢aside,‍ the‍ expense is ​a key consideration ⁢when choosing your‌ kitchen backsplash materials. Let’s compare⁢ the costs of our green choices:

Material Average Cost (Per Square Foot)
Recycled Glass Tiles $20-$50
Terracotta Tiles $5-$15

While recycled glass‍ tiles ⁢might cost more upfront, their durability and prolonged​ lifespan can result in long-term savings. On the other hand, Terracotta tiles, while cheaper, may need more frequent replacement‌ due ⁢to potential chipping and staining.

The Green Impact

Adopting eco-friendly materials in your home doesn’t just contribute to preserving the environment; it can also enhance the ⁣health and well-being of ‌those ⁤living in ⁤the space.‍ Many conventional⁣ building materials contain⁣ toxic substances that can off-gas into your home for years. By choosing green ⁣materials, you’re avoiding ‌those hazards, creating a healthier home environment.

Making the⁣ Switch

As we become increasingly conscious of our⁣ impact on the environment, even‌ small changes such⁤ as replacing ‌your⁢ kitchen backsplash with ‌eco-friendly materials can make⁢ a significant difference. Not only will you make a statement about‍ your commitment to sustainability, but you’ll also ​have a trendy and unique​ kitchen that stands out aesthetically.

At the end of the day, going green⁤ isn’t just about⁣ saving Mother Earth. It’s about embracing ⁢a lifestyle that’s healthier, safer, and creates a ‍lasting positive impact on⁤ our environment.

Scroll to top

Gulf Remodeling | General Contractor Houston | Home Remodeling Houston | Kitchen Remodeling Houston Bathroom Remodel Houston | Commercial Remodeling Houston | Houston Home Repairs

Call 832-500-7810
Free Quote
Gulf Remodeling